What Are Face Filters?
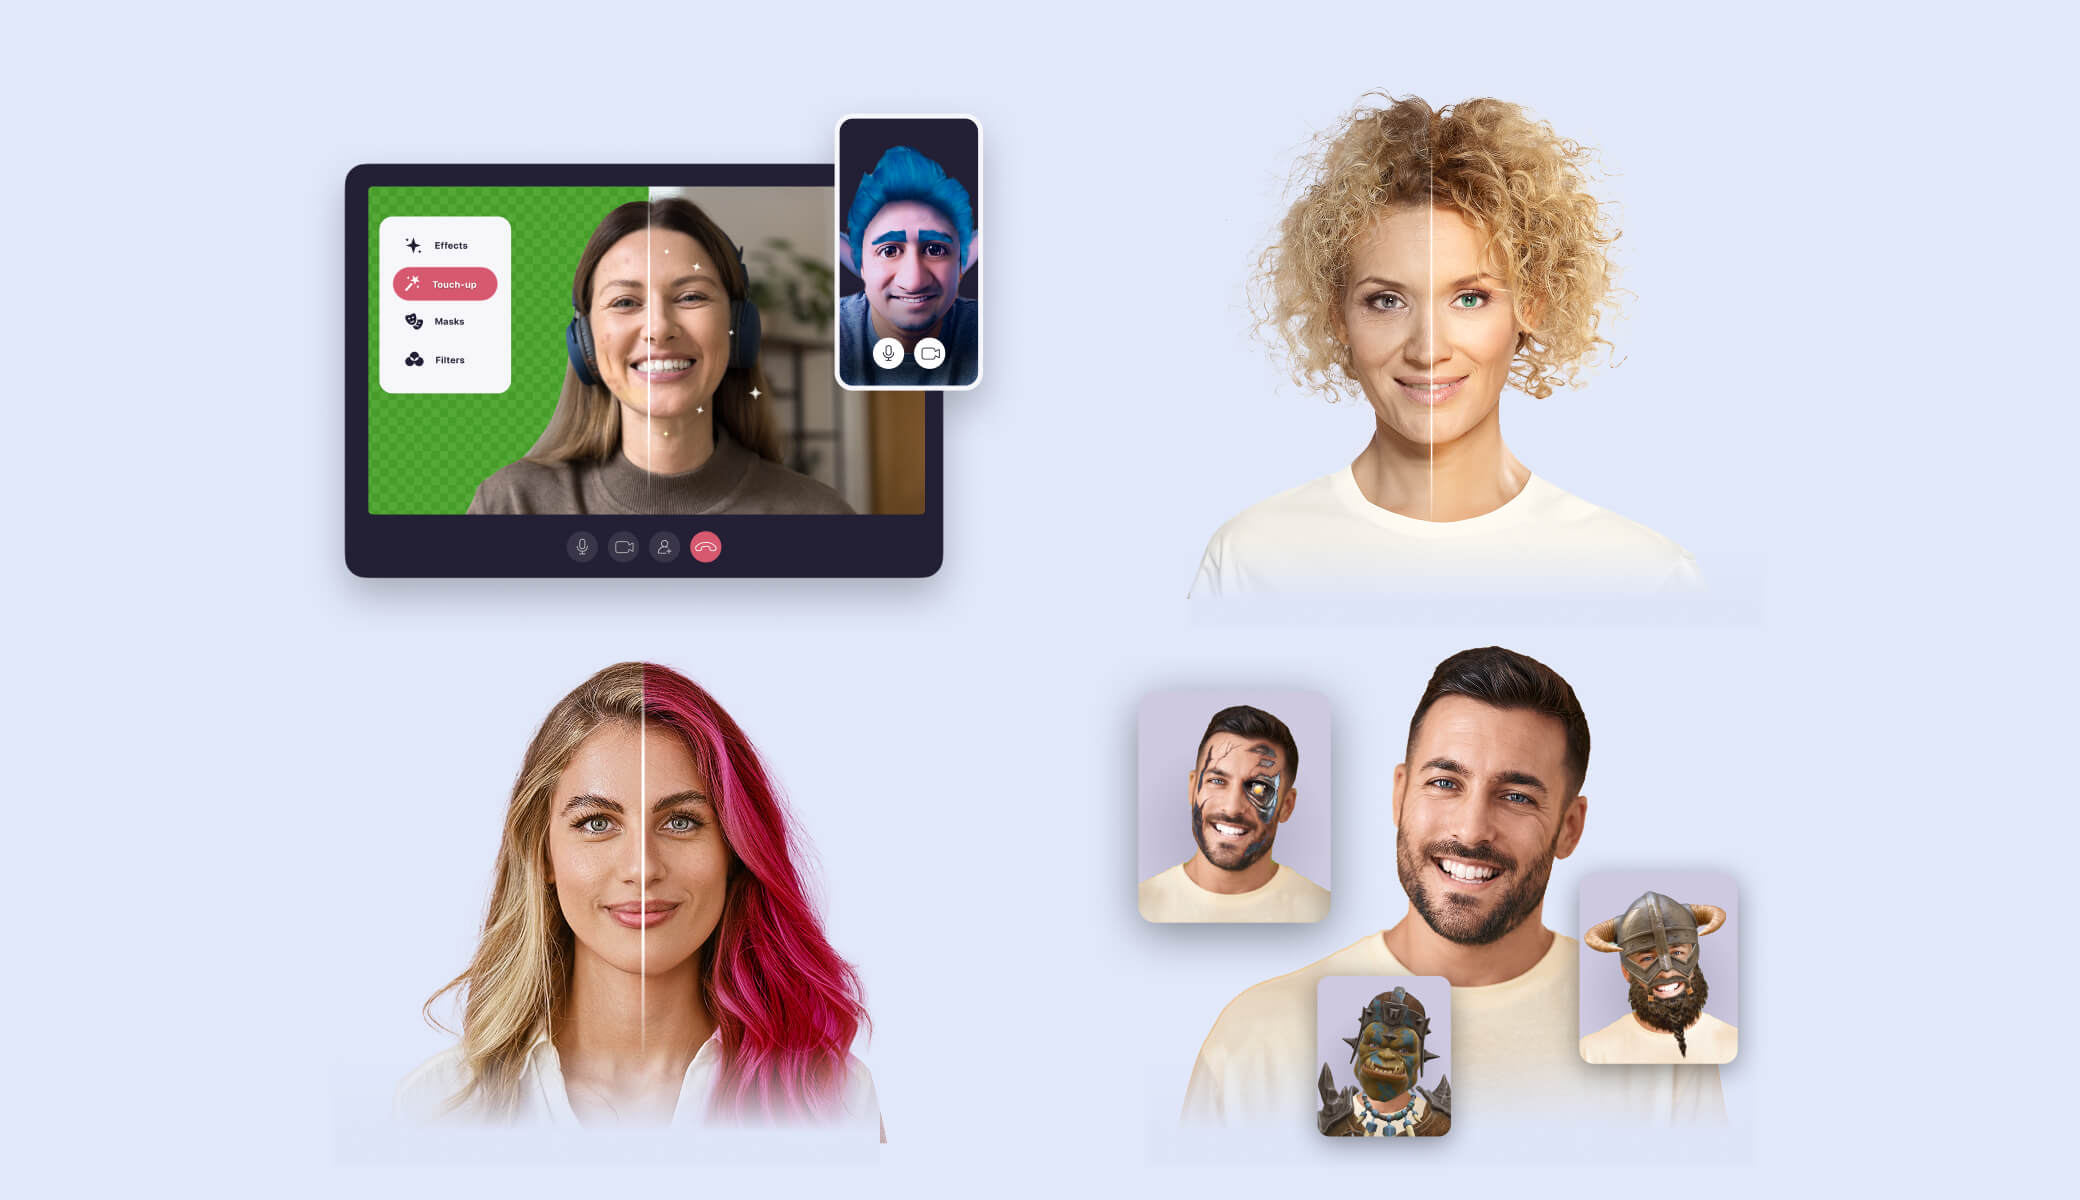
Face filters are augmented reality effects enabled with face recognition technology. It overlays 3D objects and animation on the face in real-time, so you can capture engaging videos and photos. Introduced by Snapchat filters back in 2015 as a fun way to dress up your selfie, today AR filters have become a meaningful communicational tool.
Augmented reality lets users transform themselves into anyone or anything they please, turning selfies into a storytelling adventure. You can superimpose 3D objects onto the face or backgrounds, animate facial expressions, try on virtual products, add AR makeup, and much more.
 Snapchat-like AR filter
  Face morphing effect
 Cartoon-like AR filter
Augmented reality filters are used in:

Benefits of Custom AR Filters for Brands, Developers, and Creators
AR filters are a powerful engagement tool that brings numerous benefits to developers. Using AR filters, you can capture attention to your app or product, let users self-express creatively, and create and share marvelous photos and videos on the web. They can help you bring organic traffic and drastically boost the enjoyment of using your app.
6 Benefits of AR Filters for Brands
- Increase awareness with filters that reflect its values, idea or products.
- Reach out to millennials on mobile and social networks with innovative AR experiences.
- Promote products with AR letting consumers try them virtually.
- Reduce returns and personalize the shopping experience.
- Сreate effective AR ad campaigns on any channel - web, mobile and outdoor.
- Inspire consumers to take and share photos with branded filters and spread the word.
5 Advantages of AR Filters for Developers
- Boost user engagement and content sharing.
- Increase user sessions in the app using animations and Face AR games.
- Bring organic traffic and inspire user-generated content (UGC).
- Improve retention by keeping users engaged with new filters.
- Improve video communication in their apps through engaging AR features.
4 Pros of AR Filters for Content Creators
- Self-express on social media.
- Expand follower base in a short period of time and few efforts.
- Monetize followers and partner with brands.
- Gain social recognition and attention, and become influencers.

How to Create Face Filter: 8 Steps to Immersive AR Experience
Individual augmented reality creators who want to make a custom Instagram face AR filter opt for the Spark AR Studio. The platform makes AR effect production available to anyone. However, with Spark AR you can create masks for Instagram only.
If you want to develop your custom filters and integrate them into your app, you need a Face Filter SDK and its Studio tools.
Among its advantages, you can:

Here are the basic steps you as a designer or product manager must follow when developing AR content for your app.
Step 1. Research your audience and persona
Target your audience based on the traits that make them unique. Segment your audience to deliver augmented reality content that resonates with their interests.
Describe:
-
Age
-
Gender
-
Geo
-
Ethnicity
-
Interests
-
Favorite apps.
When you understand your potential users, you can target them with better content, so try to describe your persona profiles in detail. Define 3-6 key personas and the type of effects that may catch their fancy. Here’s an example of a persona profile.
-min.jpg?width=680&name=Persona%233-for-MojiCam--(1)-min.jpg) Example of the target persona profile
Example of the target persona profile
Step 2. Describe the context and USP
Define the context of when and how users will interact with your augmented reality effects. They may animate faces to have fun, gain social recognition among peers, or for self-expression. Think of the USP (unique selling points) and the value you aim to add to your app when integrating AR face filters.
Define:
- Why and when would people use your effects?
- What value do they bring to users?
- Which problems do they solve?
- Have people seen something similar before? Where?
- How does your AR content differ from competitors?
- Why would people share an effect?
Step 3. Monitor trends and competitors
Gain more insights about your audience by researching trending topics in your domain or globally. From there, you can get additional inspiration and ideas for your AR filters.
How to monitor:
- Social media monitoring
- Social listening
- Trending challenges
- Keyword and tag research
- News and influencers.
Check popular face AR filter apps and steal away ideas and the best practices for effects design. Modify and customize to make them unique.
-min%20(1).jpg?width=680&name=face-filter-apps-(1)-min%20(1).jpg) Key app providing face filter functionality
Key app providing face filter functionality
Step 4. AR Filter design workflow
You can make different types of face filters, from simple 2D stickers to augmented reality filters with triggers and animation. Some custom filters are more complex to implement, and they require coding. The general workflow looks as follows.
- Design filter assets. You may design effects in any 3D graphical editor like MAYA. Generally, a 3D filter consists of materials, textures, and geometry which you export in .fbx format.
- Upload assets to Filter Editor. The AR Filter Editor tool converts files into supporting formats compatible with Face AR SDK.
- Configure effect properties. Then you can set the draw order, add beautification, audio, etc.
- Construct effect. The 'Construct' button generates the effect file which you later upload to the app.
- Preview in real-time. Using the Viewer component, you can test your effects on the desktop before sending it to production.
The video below provides an overview of the face AR filter creation process. Check more in-depth examples on how to make a specific type of effect.
Step 5. Develop and optimize
To make sure your face-tracking custom filters perform well on a broad range of devices, you need to keep them lightweight.
Read More: How To Optimize 3D Face Filters For Mobile
Key points:
- Reduce and optimize AR face filter textures
- Use the most optimal set of 4 textures: Base color, Normal, Roughness, Metallic
- Minify polygons
- Optimize skin files and video files
- Consider the effect performance on different devices — both powerful and low-end ones.
- Develop 2 versions of a complex effect — the full and optimized.
Step 6. Test your effect
Low-quality filter performance disappoints users and can lead to negative reviews. Make sure to test your AR effects properly before uploading them to the app.
Your Checklist to Test Effects
Performance iOS, Android:
- Real-time face AR filter — at least 30 FPS on iPhone 5s, 6, 6plus | Samsung s8/Huawei P10/Mi6 and higher
- AR mask and video recording — at least 30 FPS on iPhone 5s, 6, 6plus | Samsung s8/Huawei P10/Mi6 and higher
User experience:
-
You can take a photo or/and video with the effect.
-
The effect works stably on the front and rear cameras.
-
The effect works stably with a face in the camera, no face, and a disappearing face.
-
Effects with a trigger, tap, swipe or voice changer have a hint about it.
-
Effects are stable at different angles (90 /180 degrees rotation, upside down)
-
Masks stretch on the face with wide-open mouths, grimacing and no elements overlap one another
Device compatibility:
Step 7. Measure engagement
Measuring user engagement with your effects helps you better understand your audience and deliver a successful app. Track how users interact with your custom filters to see which effects perform best and which one needs a redesign.
What to monitor:
- Taps and swipes on the screen
- User session duration
- Share ration
- Video- and photo-taking ration
- Users by country
- User retention
- Feedback and reviews.
Step 8. Iterate and improve
To maintain a successful user involvement, you need to develop and test hypotheses on new effects, and optimize and iterate them to reach your target in terms of acquisition, retention, engagement, and revenues.
Your next steps:
- Research, develop and test the hypothesis
- Update effects regularly: daily, weekly or monthly depending on your app concept
- Keep track of user satisfaction
- Use in-app feedback forms
- Engage users in poles on social networks
- Read and gather insights from app ratings and reviews
- Promote new effects with push notifications.
Summing Up
AR face filters are powerful viral content that can spread across the entire web and grab the attention of millions of users in a matter of days.
Primitive face masks fall short to surprise or engaging the audience. Today, the AR industry embraces unique and creative ideas; this is where the right Face filters AR software is needed.

.jpeg)
.jpeg)

 Snapchat-like AR filter
  Face morphing effect
 Cartoon-like AR filter
-min.jpg?width=680&name=Persona%233-for-MojiCam--(1)-min.jpg) Example of the target persona profile
Example of the target persona profile -min%20(1).jpg?width=680&name=face-filter-apps-(1)-min%20(1).jpg) Key app providing face filter functionality
Key app providing face filter functionality

